Tool Tips and Documentation
PRODUCT SPECIFIC DOCUMENTATION
PRECISION TUNING GUIDE
Edge Tuning
You Are Not Crazy
Sure you're looking down at your gear fully prepared to scrape, polish and file material OFF of your precious edges and bases. But remember, no matter what takes you down the mountain-pencil skis, snowboard, or shaped skis- your ride will be improved with a carefully applied hand tune. The right tools make tuning a simple process.
A base grind or machine tune is only the beginning. Even the experts use a hand tune to finish their machine tuning. And since you're reading this message while holding FK tools, it's obvious that you've got the best gear for the job.
This only takes a half hour so let's get started....
Tools You Need
The FK Edge tuners or World Class Tuning file guides will give you the precise angle you want.
A DMT Diamond stone (optional) or ceramic edge stone will help remove case hardened burrs before you begin your edge tune and maintain sharpness withoutremoving excessive edge material.
A rubber gummy stone helps de-tune your tips and tails.
Note: Most snowboards come factory tuned with a straight 90 degree base and side edge and in general the tip and tail edges should be de-tuned to improve the ride. Most skis and especially shaped skis come factory tuned with some degree of base and side edge bevel applied. It is always a good idea to check with your shop or the factory for specs and suggestions before changing the angle of the bevel.
Getting Started
Stabilize your board or skis in a FK Tuning vise or suitable support like the back of two chairs. Start with all edge conditioning on the base edge and then move to the side edge. Remember to always work from the nose to the tail. Waxing comes after edge tuning.
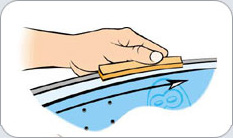
Step 1: Deburring
Begin with a Deburring stone or DMT Diamond to smooth the burrs from the edges. Apply slight pressure on the stone and run it down the base of each edge then along the sides. Work out all the gouges and nicks by concentrating on the area going for a smoothe feel to the touch.
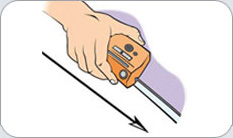
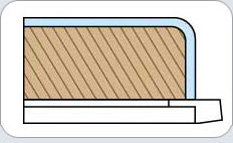
Step 2: Base Edge Tuning
Use a flat file or base bevel guide, like the MT701, MT717,or MT719 to bevel the base precisely for your style of riding. (See beveling techniques.) Make sure the file teeth face the direction of movement as the files only cut in one direction. Take off as little as needed to achieve the angle desired and a clean, sharp edge.
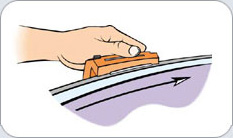
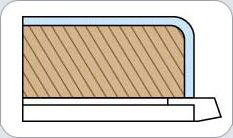
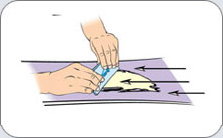
Step 3: Side Edge_Tuning
Your goal is to get a smooth 90 degree or sharper angle between the base and side edge. An FK Edge Tuner like those mentioned above or the MT704,MT706,or the NEW MT734 will make it easy to get a consistent angle. Remember the edges at the tips and tails ahould be de-tuned or duller to keep from catching on edge and hooking (tips) and allow smooth transitions in turns(tails).
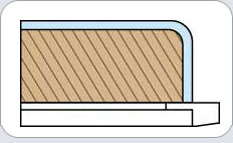
Recommended Beveling Techniques
Waxing
Advantages
Simply put, wax makes it easier to glide over the snow. In addition to improving performance, waxing protects your base from damage caused by use as well as by moisture, UV rays, and dirt. It pays to wax before you ride.
Step 1: Base Cleaning
Clean your ski base with base cleaner or wax remover. Then allow 15 to 20 minutes for the cleaner to evaporate before beginning base repairs or waxing.
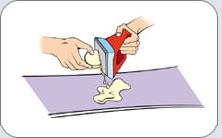
Step 2: Base Repair
Fill in any gouges and scratches with a drip repair candle(P-tex). Hole the drip candle close (less than one inch)to the base, slowly filling the gouges and scratches. Once the repairs are finished, let your base cool to room temperature. Use the metal scraper held at about a 45 degree angle to scrape the excess material from the ski bottom, working from tip to tail.
Step 3: Waxing
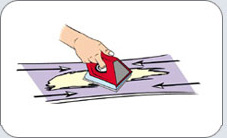
Choose the proper wax for the conditions you will encounter. A universal wax will work well for most recreational riding. Use a warm waxing iron to apply hot wax to your ski bases. Hold the bar of wax against the iron. Never touch the iron to the ski base without a layer of wax in between. The wax should melt, but hot smoke, as it drips onto your base.
Move the iron over the base to smooth the wax. Allow the wax to cool to room temperature. Then use a plastic scraper to shove the excess wax down to a thin even layer. As a last step polish the waxed base lightly with an abrasive pad to improve glide characteristics.
Best of Luck!!
Phone : 262-652-3126
Toll-free: 800-877-7025
Fax: 262-652-3188